
Hosting
Setting up email using cPanel
Create Email Accounts in cPanel (Quick Setup Guide) Want an address like you@yourdomain.com instead of a free mailbox that looks less official? Creating Email Accounts in cPanel is how most site owners and small teams get branded inboxes for support.
Published April 22, 2022 · Updated July 25, 2026
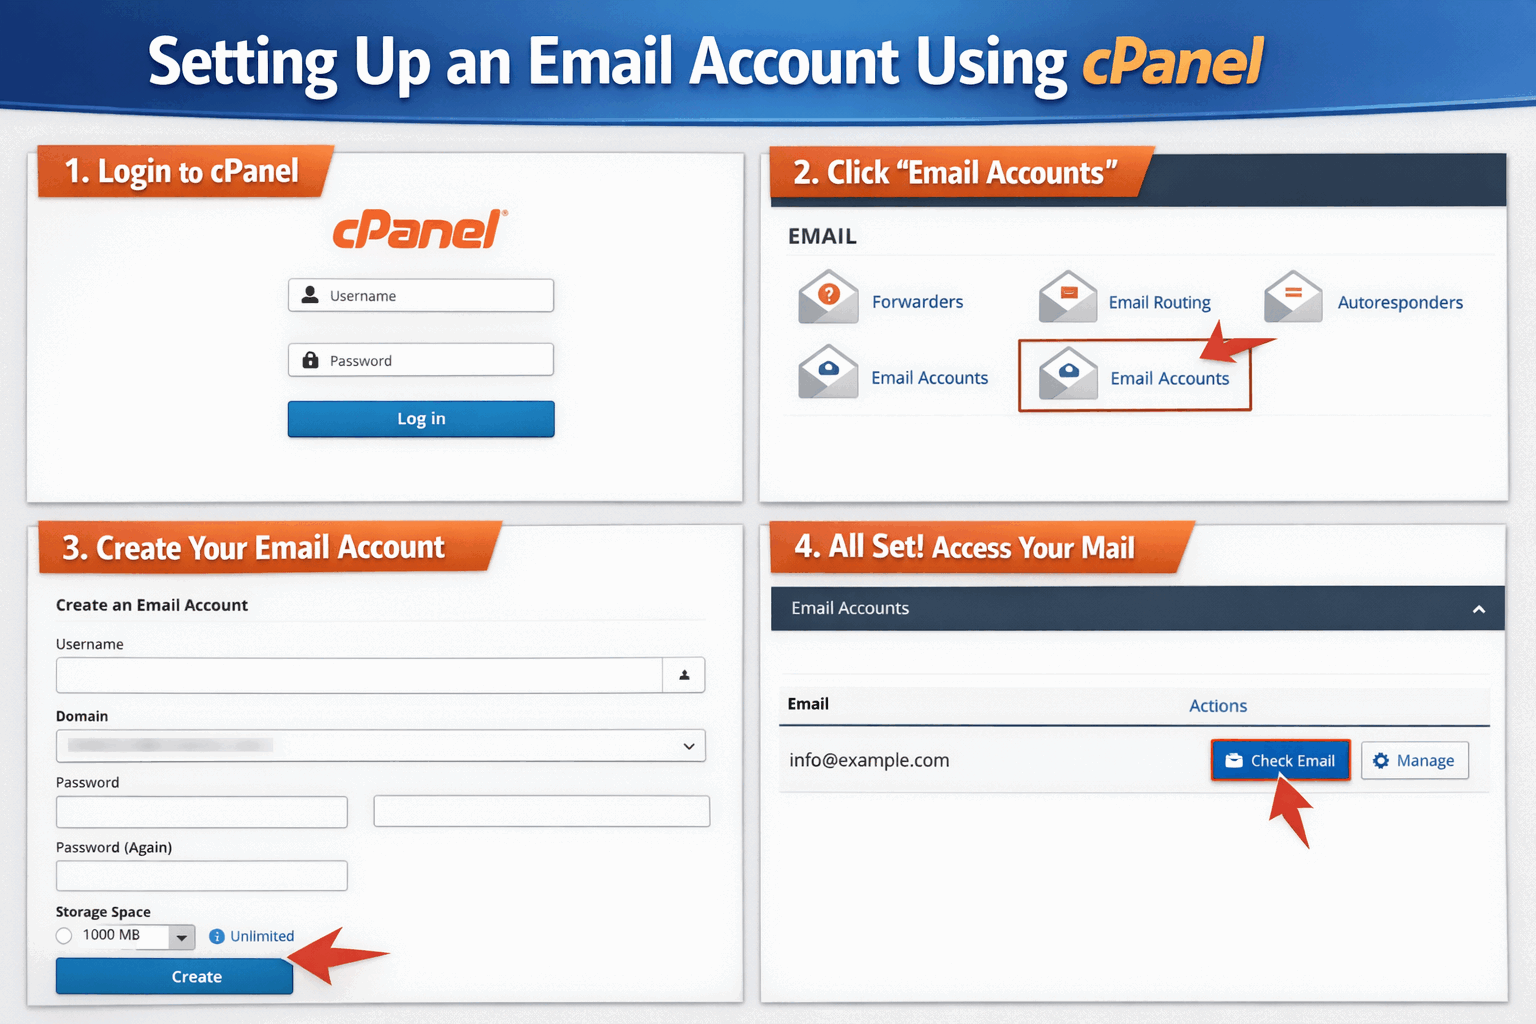
Want an address like you@yourdomain.com instead of a free mailbox that looks less official? Creating Email Accounts in cPanel is how most site owners and small teams get branded inboxes for support, billing, or staff.
In this guide, you'll create a working inbox, set a password and quota, and learn where to log in right away. Your host's cPanel theme may look a bit different, but the flow stays the same.
Logging in to your hosting dashboard is the first step. Before you start, make sure you have: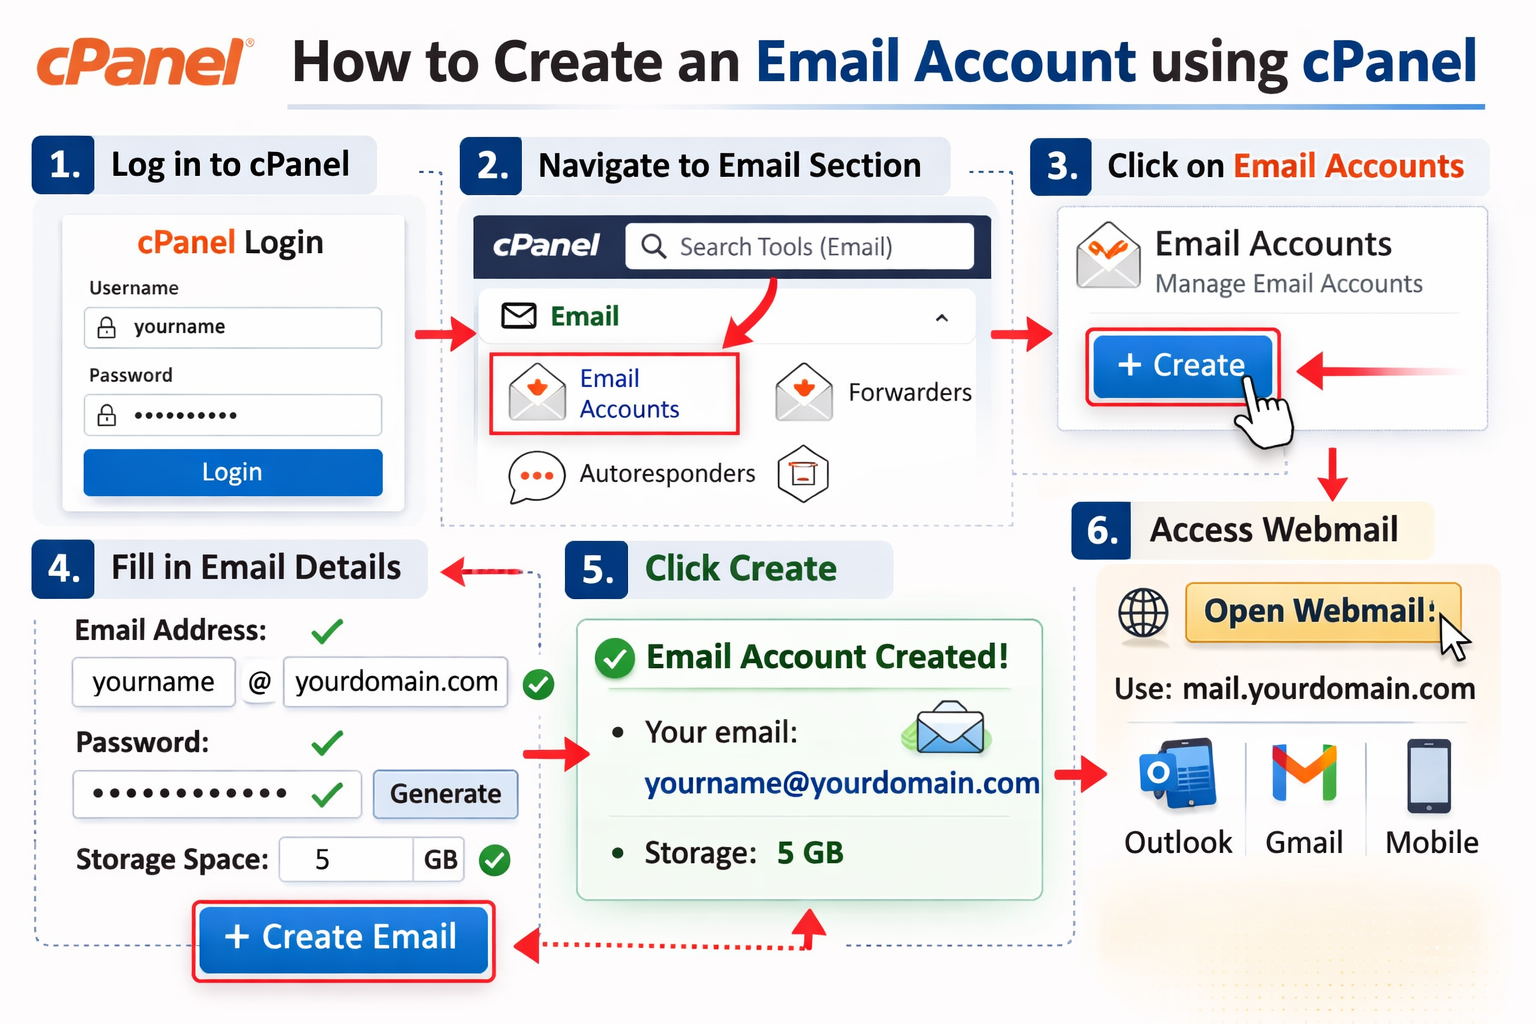
An email creation form on a screen, similar to what you'll complete in cPanel. Follow this path in cPanel: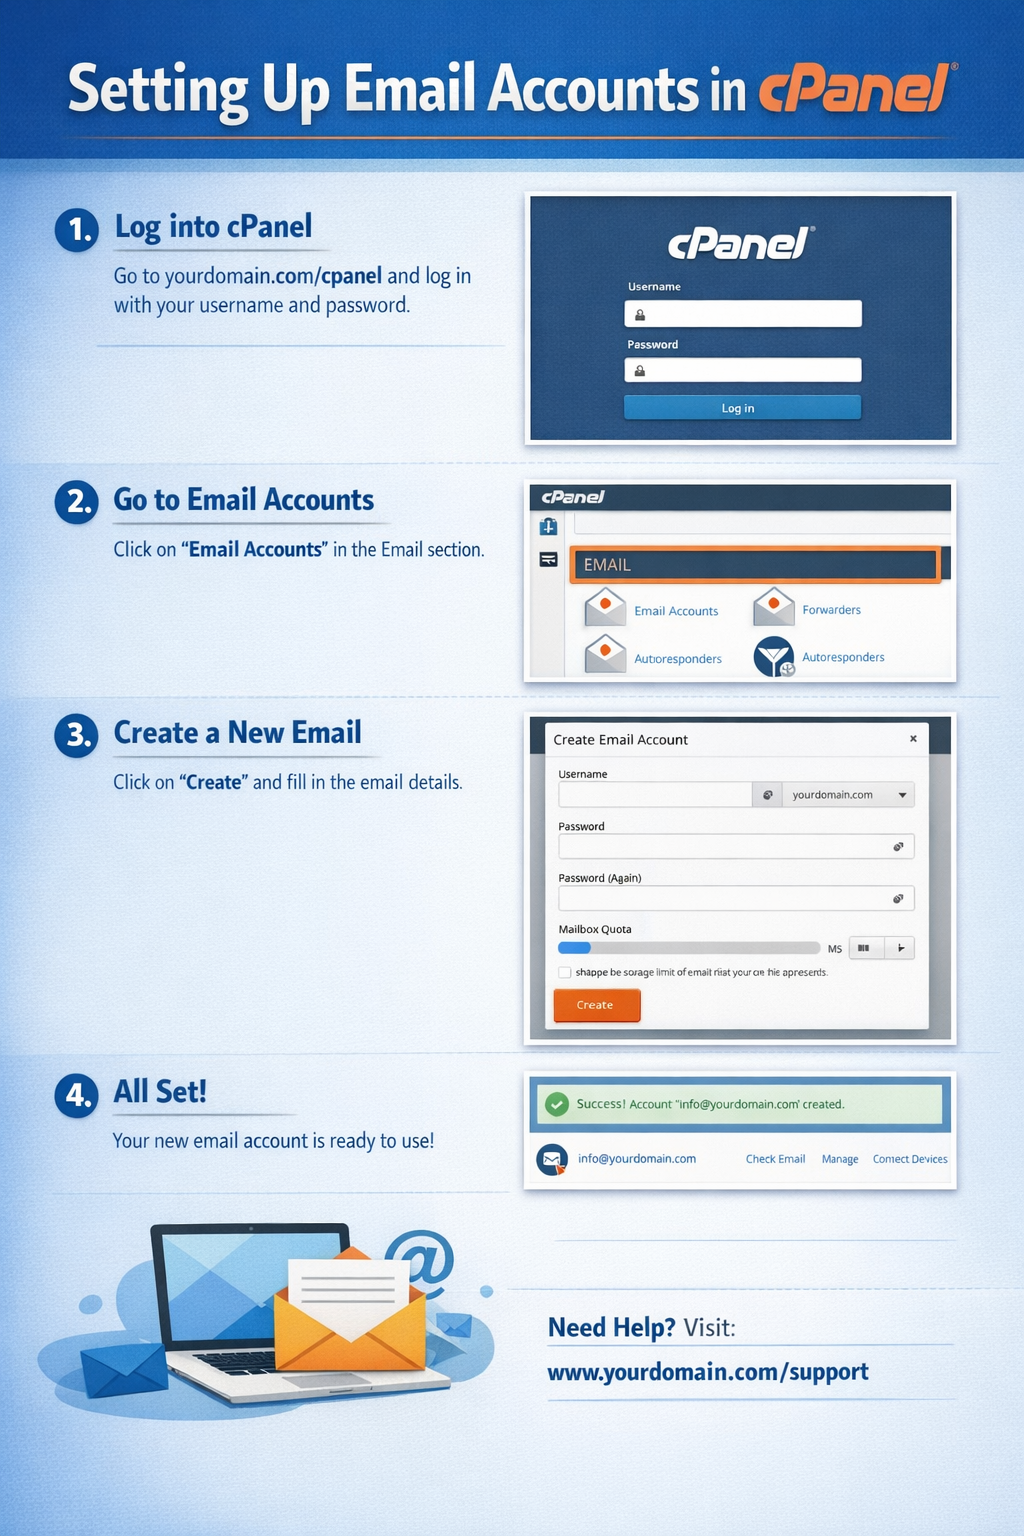
Checking a webmail inbox on a tablet or PC. To read email right away, return to Email Accounts, then click Check Email, then Open Webmail. Log in with the full email address and the password you set. Need Outlook, Apple Mail, Android or a phone mail app? Click Connect Devices next to the mailbox. You'll find the IMAP and SMTP settings there. For safety, enable two-factor authentication in cPanel if your host offers it. Also, don't create extra mailboxes "just in case." Fewer accounts means fewer targets. Finally, review spam settings so important messages don't get buried.
Before you create Email Accounts, check these quick requirements
Logging in to your hosting dashboard is the first step. Before you start, make sure you have:
- Access to cPanel (username and password from Htech-Solutions.com)
- Your domain added inside cPanel
- Email service enabled on the hosting plan
- Your cPanel login URL (
yourdomain.com/cpanel, or from our client area) - Enough disk space for new mailboxes
Find your cPanel login and confirm the right domain is available
Many hosts supportyourdomain.com/cpanel or cpanel.yourdomain.com. We use a custom account portal button instead. Once inside cPanel, you should see your domain listed on the account. If the domain doesn't show later in the domain dropdown, it may not be added yet, or it's not active.
Step by step, create a new email account in cPanel
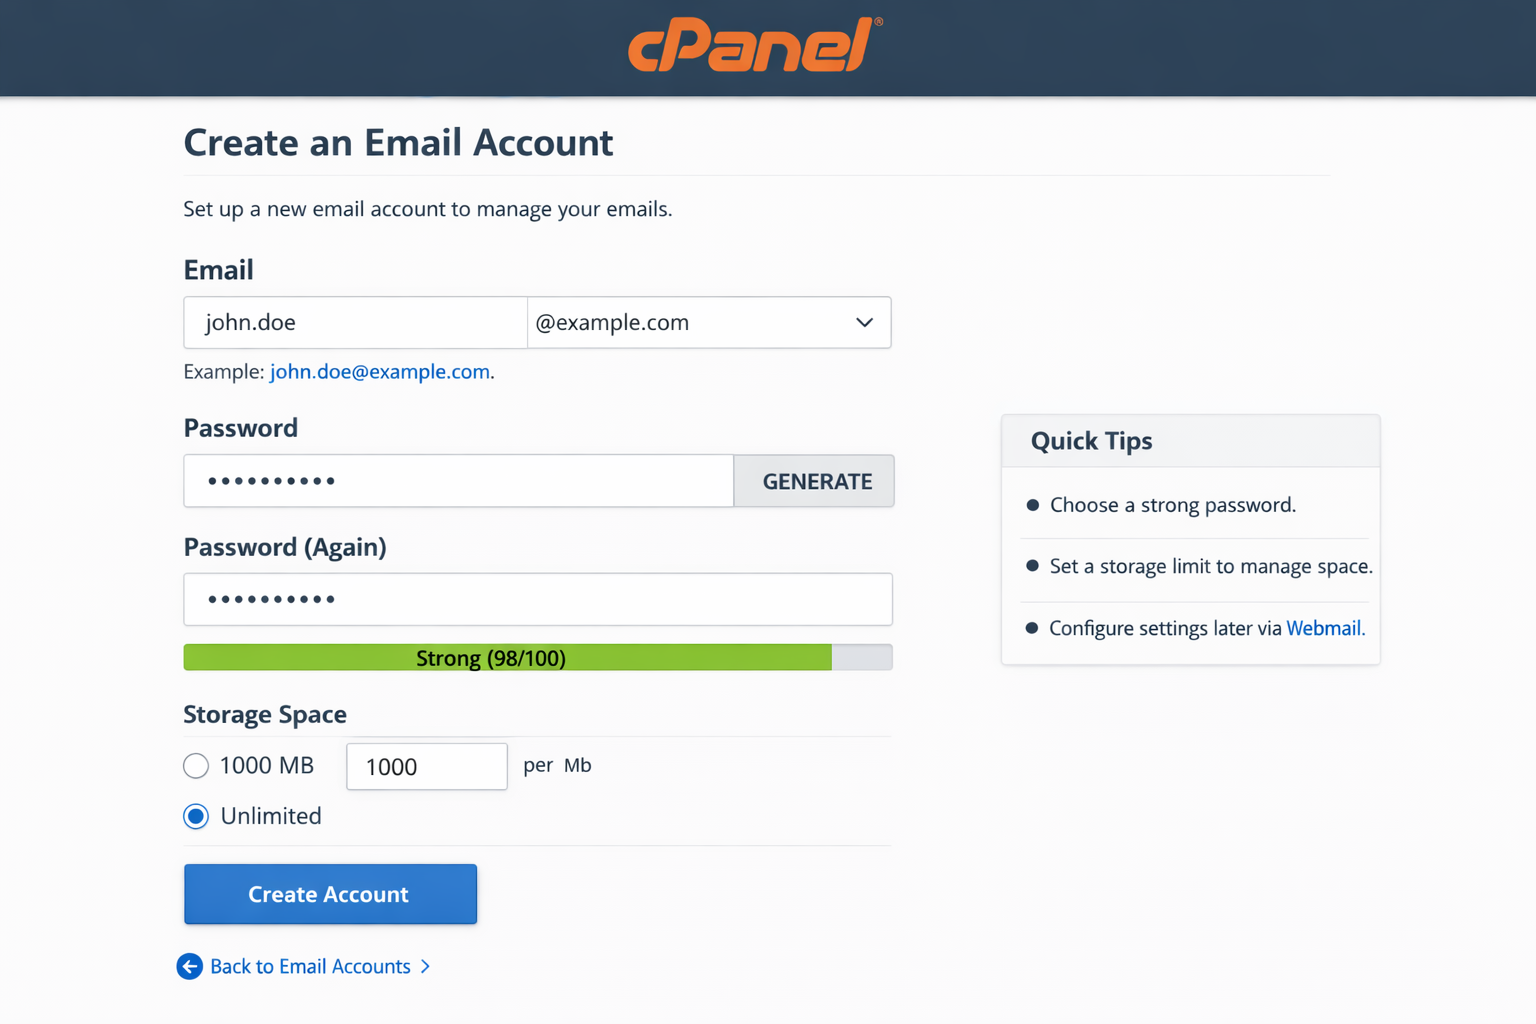
An email creation form on a screen, similar to what you'll complete in cPanel. Follow this path in cPanel:
- Log in to cPanel.
- Scroll to the Email section.
- Click Email Accounts.
- Click + Create (or Create).
- Choose the correct domain from the dropdown.
- Enter the username (the part before @).
- Set a strong password (or use Generate).
- Choose a mailbox quota (or keep the default).
- Click Create.
Pick the address carefully, many hosts don't let you rename an email address later. You usually create a new one instead.
Choose a smart address name, password, and mailbox quota
Use names people expect:info, support, billing, or first.last. Avoid quirky names that confuse customers.
For passwords, aim for 12+ characters, and keep it unique per mailbox. A reused password is an open door.
Quota depends on use. A single person might need a small limit, while a shared inbox needs more room. When a mailbox fills up, incoming mail can fail, so leave breathing space.
Start using the new inbox, and lock it down for safety
Checking a webmail inbox on a tablet or PC. To read email right away, return to Email Accounts, then click Check Email, then Open Webmail. Log in with the full email address and the password you set. Need Outlook, Apple Mail, Android or a phone mail app? Click Connect Devices next to the mailbox. You'll find the IMAP and SMTP settings there. For safety, enable two-factor authentication in cPanel if your host offers it. Also, don't create extra mailboxes "just in case." Fewer accounts means fewer targets. Finally, review spam settings so important messages don't get buried.
Quick fixes if something does not work
- Can't log in to cPanel: Try our client portal link, reset the password, and clear browser cache.
- Email section is missing: Scroll to the bottom of the page.
- Mailbox quota is full: Delete large messages, or raise the quota in Email Accounts.
- Can't send or receive: DNS or MX records may point elsewhere, contact your host.
- Forgot the email password: Reset it from Email Accounts.